Monday, September 28, 2009

While Working on…

the Millinea Mint project, I pulled out the pattern i had that has that really beautiful bodice and the really very incorrect pattern for same bodice and decided to give it another try. I will not say how many times i have tried to get this pattern correct but I did manage to do it this time!!!! I did it Saturday and today I am going back over it to make the corrections that always seem to need to be done so that you can have a copy of the pattern for the bodice if you are interested.

bodice3 001

This is the bodice before the last row that goes on around the neckline. While working on this i decided that it was just too good not to pass it up, to make this into a ballerina outfit. It will have layers of gathered tulle for the under skirt and panties.From there gold thread can be used to make trim around the edges, feathers or other trim can be added and any ballerina outfit will appear from the crocheter’s imagination.

Thursday, September 24, 2009

I neglected one thing when i posted "the Next Installment of Millinea Mint"; that link to the pattern. So, here it is...
MillineaMint.pdf
Sorry about that. I didn't mean to forget the link.

Saturday, September 19, 2009


I have some really good links for doing makeovers in case anyone is interested.

The first one is for restoring Barbie’s hair.

http://www.rebeccachulew.com/ezine/hairrescue.html

i that doesn’t work then you might want to try re-rooting….

http://www.wideeyedgirls.com/rerootinstruction.html

In either case you may need some styling help….

http://members.fortunecity.com/customdolls/hair1_page.htm

But then, if all goes wrong there is always this one

http://www.rebeccachulew.com/ezine/moldedhair.html

and then there are some other tips that may come in handy…

http://www.geocities.com/RodeoDrive/Mall/3309/customizingtips.htm

In any event these pages have been up for a long time and who knows how much longer they will still be up. So, if you are interested, now would be the time to collect this information and store it on your computer.

Friday, September 18, 2009

The Next Installment of Millinea Mint

I have trim finished and on the bodice. I cannot finish the outfit or the bodice till I can get some more mint thread ‘cause i don’t have enough. I will save this thread that I have for the over-skirt and the new thread will go for the petti-hoop underskirt. This is just in case they don’t match. I also need to get some size 30 mint thread for the placket which I can get from Simply Treasures or Herrschner’s. The thread I used was Royale size 10 and I don’t know how well the new thread is going to match.

In case you didn’t know it those little miniature wooden clothespins are great for holding trim in place…

great way to use miniature clothes pins

Because of copyright issues this pattern cannot be given out but I will show you here what i did.

  1. The pattern states that the bodice edging was to be done in size 10 thread and #9 hook. Size 10 thread is too heavy for this and you should be using size 20 thread with #10 hook.
  2. I also added 10 more half rice stitches than the pattern stated.
  3. For the upper edging I repeated that first section up through the picot at the beginning of the row and the end and made the picot a ch-3 picot. This row does the base shaping and the next row finishes the shaping so be careful to follow the instructions.
  4. On the lower edging the 3 ch-3 loops I changed to ch 2, sc, ch 3, sc, ch 2, sc and under the picots just one sc in those 2 sps.

ch2ch3ch2 That’s all i can give out.

The finished bodice (well, the nearly finished bodice) looks like this….

millinea-mint 002And the edging fits perfectly….

millinea-mint 001b

Sorry that i didn’t have the size 30 thread to finish the placket for this installment and it will probably be a month before I can get more thread so I will have something else in the meantime.

Tuesday, September 15, 2009

New Links and Edgings

I've added some new links for those interested in fashion of a couple of centuries ago. I've found some new information i did not know about. There was a corset made with a bustle to handle the style of the 1880's. While this is much better than the cage i have seen it would still be hard to sit on anything. But i do so love the styles; the layers of trims on the bodices and skirts. These links are listed under Fashion Notes.

I was working on the edging for the Sleeve of the last post and had hardly started when i thought of another way to do the edge. The first edge was looking so cute though, I decided to do both edgings.

First Edging -


Second Edging-

I have put them together in the file you can find here.

Saturday, September 12, 2009

New projects

I have acquired a few of the patterns i had been wanting over the years and so now have the lovely choice of working on this or that one and am having trouble deciding which to work on first. So i guess i will work on several at the same time.

Usually when i get a pattern i try out the lace that goes on the neck line and shoulders. That is the icing on the cake. But if the icing does not turn out right then the cake is not going to get done. I do think I work differently from others, and this is not the way i work if i am doing a pattern from the start. Any way of was working on 2000 Millennium Collection for March (the only one i have right now from this year) found out, so far, that the trim was done in size ten according to the pattern but size 20 on the model and I always hated how it dipped way down in the front when I wanted it to go around the neckline of the dress. I did the lace according to the pattern and, yes, that confirmed what I already knew, so I will have the lace done for the neckline later. I set it aside to do the bodice.

I have always hated the way the bodice instructions do not come near the look on the model so i knew i was going to have to re-do it. So i did. I have the pattern if anyone wants it, but I just did a generic pattern not according to the model either. Somewhere in-between this nightmare and reality is the real bodice that I cannot seem to find. But here is what this one looks like...

And then i took that apart to the waist and put on my own little bodice pattern here with photo below.

And then did the sleeves. And it tickeld me that they came out so cute and perfect. Both bodices and the sleeve are included in the patten So have fun (for those into this kind of crochet work) I have to do some more crocheting.

Wednesday, September 9, 2009

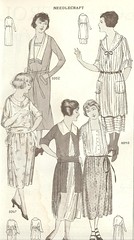
Dresses for Spring, 1921


Dresses for Spring, 1921
Originally uploaded by blueprairie

For those into fashion - you will love this information. It's what goes on under the clothes that make the silhouette. Don't neglect clicking on the link.

Another item of interest this morning is freevintageknitting.com/doll-clothes-patterns. I know this is knitting but for those who knit also you will enjoy this finding.

Tuesday, September 8, 2009

If you are into making over or just styling fashion dolls I have a couple of links for you.
These are excellent tutorials on doing Barbie's hair.
  1. http://www.rebeccachulew.com/ezine/hairrescue.html &
  2. http://members.fortunecity.com/customdolls/hair1_page.htm
The second link is a 2-pager. I found these some time ago and I would suggest that you save the pages if you are interested because they may not be around forever.

Monday, September 7, 2009

Little Doily #2 - Waterlily

This one has a name even. It is also miniature which can be done in size 20 thread or tatting cotton for other size dolls.

Materials
  • Size 30 crochet cotton
  • #12 hook
Special Stitches

picoted fan (fan) – [(dc, ch3-picot, ch1) 3 times, dc] in same lp

Instructions

ch 6, sl st join to form ring.

Rnd 1: Ch 4 2-tr cluster ch 4, sl st in ring 8 times but on the last one make a 3-tr cluster and omit the last ch 4.
Rnd 2: In first petal ch 3, 8 dc in top of cluster, in each remaining petal 9 dc in each cluster around. Sl st to top of first ch 3.
Rnd 3: Sc in joining, (ch 4, sk 1 dc, sc in next dc ) 3 times, ch 1, sk 2 dc, sc in next dc, rep from *around ending with sl st to first sc.
Rnd 4: sl st to first lp, sc in same lp, * ch 2, fan in next ch-4 lp, (ch 2, sc in next lp) twice, rep from * around ending with a sl st to first sc, fasten off..

Wednesday, September 2, 2009

Want a Doily?

How about a little doily just for the 12” and under crowd?

Sometime ago i was wanting one for a little table i saw at the Victorian Woodshop. I still don’t have the table, but i can dream. Anyway, i have the doily! This one is 2 1/2 inches across and if you want one a little large just make it in size 20 thread or if you want it for 1/12 scale make it in tatting cotton or finer (size 70 – 100). So here is the pattern….

tinydoily-2

Doll’s Doily #1

Materials

  • size 30 crochet cotton
  • #12 hook

Instructions

Ch 4 and sl st to form ring

Rnd 1: 12 dc in ring

Rnd 2: (Sc, ch 2) in each dc around, sl st to first sc.

Rnd 3: Sc in joining, ch 4, 3- tr cluster in next ch-1 sp, ch 4, sc in next sc, around, ending with a tr in first sc.

Rnd 4: *Sc ch 4 lp/sp, sc in next ch 4 lp/sp, ch 4 rep from * ch 4, join to first sc.

Rnd 5: * Sc in next loop, (ch 3, sc) twice in same lp, rep from * around ending with sl st to joining.

Rnd 6: Sl st to next lp, 3-dc cluster in same lp, * ch 4, 3-dc cluster in next loop twice, rep from * ending with sl st to first cluster

Rnd 7: Sl st sc in next ch-4 lp, (ch 3, sc) in same lp 3 times, sl st in each cluster, sc in next ch-4 lp, rep from * around ending with sl st in each cluster and first sc.

Rnd 8: * 2 sc in next ch-3 lp, (2 dc, ch-3 picot, ch 1, 2 dc) in next (center) lp, 2 sc in next lp, ch-3 picot, ch 1, rep from * around ending with sl st to first sc, fasten off.