Friday, July 31, 2009

Swiss Straw Experiment

Well, I finally have the Table-top almost finished and here is the photo and extra notes on working with this stuff. I decided while working on the table-top that it would be a shame to put cardboard or plastic under it because it would loose the lacy look. So i decided to use florists’ covered wire to re-enforce the stability and encourage a flat table top. so….

furniture 011b

for rounds 7 & 12 and requires piecing the wire on round 12. I also based the circle on a beginning of 7 sc in 2nd ch from hk. and worked the next 2 rows as 2 sc in each st. and went form there. 11 rows of single crochet made a 6 inch circle.

The border (rnd 12) I changed to: sc in joining, sk 2, open fan shell of [dc, ch 1, dc, ch 2, dc, ch 1, dc] in next st, sk sts, sc in next st, rep around sl st join to first sc and fasten off.

The wire has to be pieced and overlapped; this is a little tricky. The straw does no cooperate very well and has to be made to behave quite frequently and add to that the extra wire…well you can see it is not a very long piece that is required. And trimming the length of the wires after you are done is best.

It is easy when finished to fold down the edging and have it old it’s shape though. That is a plus and if you have to block it a little to hold have the table top perfectly flat then spray with a fine spray, not too much, on both sides. This stuff get really weird when wet and you don’t want to lay anything on it to the natural texture of the stitches will disappear. Do not pull on it to much either; pull gently on opposite sides rotating the circle till the circle is perfectly shaped and let dry on flat surface.

Friday, July 24, 2009

I Can’t Believe I did that….

Lost my crochet hook for the pineapple afghan that I am working on. I probably had “minions” (as Liz would call them – referring to my little furry friends) helping me big time. But then i had a package come today from an order that i placed a few days earlier for some synthetic raffia. And so i am busy making up the Annie’s Attic ‘Wicker Wonderland’ pattern with that.


That’s the table pedestal inner support that is laying on it’s side. I figure that i will get a package of aquarium rocks to weight the base with although I did alright without anything to weight the table that i made in yarn. This would be good for little children if you glue the table top to the base and use a glue that is better than Elmers. I am using a size ‘E ‘ aluminum hook instead of D and find that that works out just fine. I would have used a ‘D’ but I haven’t had one since i left Los Angeles.
I bought the Raffia from Paper Mart in California; it was 2.95 a 100 yd. spool.

Tuesday, July 21, 2009

Lady in blue-trimmed doily


Lady in blue-trimmed doily
Originally uploaded by piapi6769

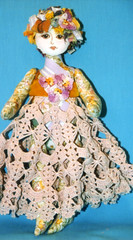
Here is another one of those darling dolls dressed with a doily skirt. Too Cute!!!! you need to see her other items.

Monday, July 13, 2009

New Sheets, New Project Part 3

Finished!

Sorry, I don’t have an iron so i cannot press it nice and smooth and pretty and these sheets do not have any polyester fiber in them. They are all 100% cotton. But they are a very nice cotton and will last a long time.pillowcase_fin

This sheet set is a very lovely pale creamy yellow and the edging is done in white. I had to get a double size because Bi-Mart did not have them in a twin size with the specifications that i gave my daughter when she went looking for them but they will do anyway on my single (twin) bed.

Sunday, July 12, 2009

Another YouTube

This is one of my favorites; better than the original, i just love the words


Isaiah 28:16
"So this is what the Sovereign LORD says: "See, I lay a stone in Zion, a tested stone, a precious cornerstone for a sure foundation; the one who trusts will never be dismayed."

LiveJournal Tags: ,,

Saturday, July 11, 2009

Rag strip hair, crochet pansies from doily


Rag strip hair, crochet pansies from doily
Originally uploaded by piapi6769

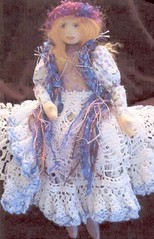
This is what you do with all those extra doilies you have laying around doing nothing.

Thursday, July 9, 2009

Variation on a Pattern

This is quite okay you know, to come up with some of your own to add to someone else’s pattern. However you cannot copyright,  share or sell the pattern as your own. So, with that in mind, I will share what I did with one of Annie’s patterns. She had this really cute little afghan that was quite fine on it’s own……

AA_afghan_Det1

And this is what i did  ….

afghan3_det

I did a fan stitch around and then did a series of ch2 and ch-3 slip stitched (instead of single crochet (sc))around.  Then as one thing leads to another, thought it would make a really nice edging for anything.

Fan Stitch Edging

This requires a multiple of 6 sts for each design repeat.

Row 1: Sc in first st, sk 2 sts, fan of 4 dc in next st, sk 2 sts, rep from * around or across, sl st join if necessary.

Row 2: *Sl st in sc, sk dc, sl st in next ch-1 sp, ch 2, sl st in next ch-1 sp, ch 3, sl st in next ch-1 sp, ch 2, sl st in next ch-1 sp, sk next dc, rep from *, fasten off at end of row/round.

Wednesday, July 8, 2009

1893 Delineator


The Delineator was the Butterick home sewers catalog. This particular pattern came from an 1893 issue, and the Description is as follows:

LADIES' BASQUE, WITH TWO UNDERARM GORES. (DESIRABLE FOR STOUT LADIES.)

(For Illustrations see Page 341.)

No. 6011.—

Other views of this basque may be seen at figures Nos. 356B and 357 B in this DELINEATOR, and at figure No. 8 on the Ladies' Plate for Spring. 1893. The basque is designed with the special needs of ladies of stout figure in view, and may be made with a high neck and a standing-collar, or with a neck high at the back and Pompadour in front, or in a shallow V at the front and back, as illustrated. It is here pictured developed in woollen dress goods and velvet, and is superbly adjusted by double bust darts, two under-arm gores at each side, side-back gores and a curving center seam; and the closing is made at the center of the front with button-holes and buttons. The lower edge of the basque forms a shapely point at the center of the front and back and is fashionably short upon the hips. The basque may have fancy elbow sleeves, or long leg-o'-mutton sleeves, with or without upper sleeves extending to the elbows, as preferred.

The upper sleeves, which will serve for elbow sleeves, when desired, are shaped by inside seams, and are sufficiently full at the top to rise fashionably above the shoulders; they are slashed at the back of the arm; and the lower edge rolls back in fanciful revers that are faced with velvet.

The basque may form part of an attractive toilette for state dinners, receptions, balls and the opera. Wool Bengaline will combine handsomely with shaded velvet in a basque of this kind, and plain velvet will unite beautifully with granite Bengaline, vrille or ondine. Less expensive fabrics are equally well adapted to the mode.

We have pattern No. 6011 in twelve sizes for ladies from thirty-two to forty-eight inches, bust measure. In the combination pictured for a lady of medium size, the basque requires a yard and five-eighths of dress goods forty inches wide, with seven-eighths of a yard of velvet twenty inches wide. Of one material, it needs three yards and five-eighths twenty-two inches wide, or a yard and three-fourths forty-four inches wide, or a yard and a half fifty inches wide. Price of pattern, Is. 3d. or 30 cents.


Posted by Picasa

Monday, July 6, 2009

This is actually the second edging for a pillow case that I have done in my whole entire crochet life (really started in 1964). Pretty sad, huh!

Well here is the photo of progress so far.


Would have had it done by now but for some reason I have had a really hard time with stitching errors like a shell missing a dc or 2. Not good. I finally ripped it all out and started all over and am doing so much better.